Hijack Your Thank You Content to Keep the Conversation Going
A lot of effort is spent trying to drive traffic to our landing pages. We often treat them as finish lines. Theform fill is all we were after and they submitted it so we’re done, right?
WRONG! (This would be a very short series otherwise.)
Landing pages shouldn’t be dead ends! Our goal is to keep the conversation going, and push your prospects through the next steps of their customer journey.
In this series we’ll look at marketing automation tactics that make better use of your Thank You Content.
Ask Your Prospects What They Want
As marketers, we spend a lot of time looking at information and making educated guesses about what our Prospects want to receive. Instead of guessing, let’s give our prospects a voice and allow them to tell us exactly what they want next.
After all, if they went through the trouble of filling out a form for your content, they probably wanted it, right? So let’s ride that wave of enthusiasm! Let’s use our Thank You Content to suggest that they self enroll in other programs. We’ll start small and make our Thank You Content look something like this:
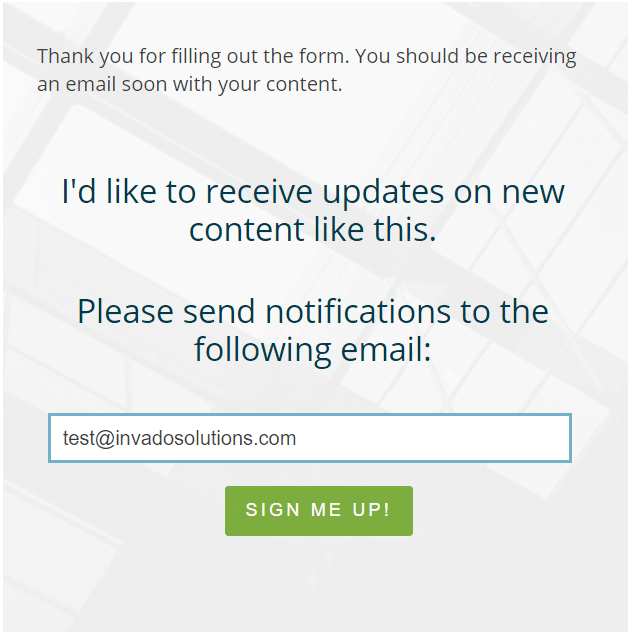
Yes, that’s a form inside another form; form-ception if you will.
This second form is going to allow the Prospect to self-subscribe to a dedicated list. We’re then going to use that list to send them List Emails when we publish content similar to this – we could also use this list in an Engagement Studio in the future.
Getting a Form Inside of a Form
Start by creating at least one static list named “Content Notification” and a simple one-field-form. I called my form “Notification Opt-In” and gave it a completion action that adds Prospects to the Content Notification List.

Finally, add a little blurb that says something like “Would you like to be notified about similar content?” I placed this in the above the form content on the Notification Opt-In form.
The next time we publish new content, we’ll send a List Email out to everyone on this Content Notification List to let them know.
Deploying the form within a form
Now that we have all the prep work done, we just need to get it live. To get our second form to display when our first form is completed, grab the embed code for the Content Notification Form and paste it into the Thank You Content section of your asset download form.

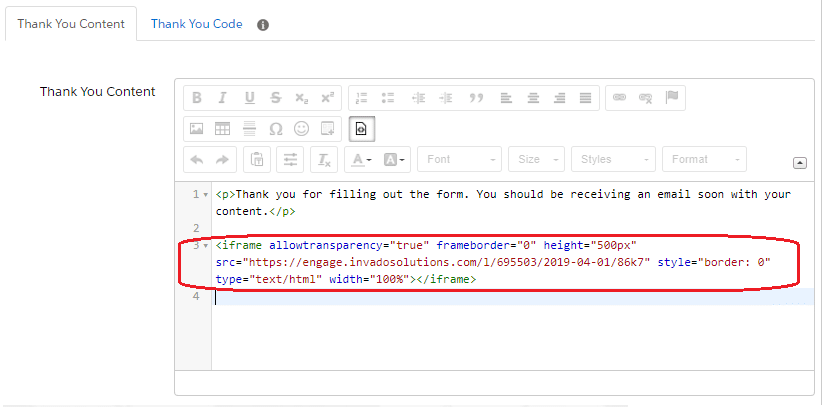
The final product should look something like this:
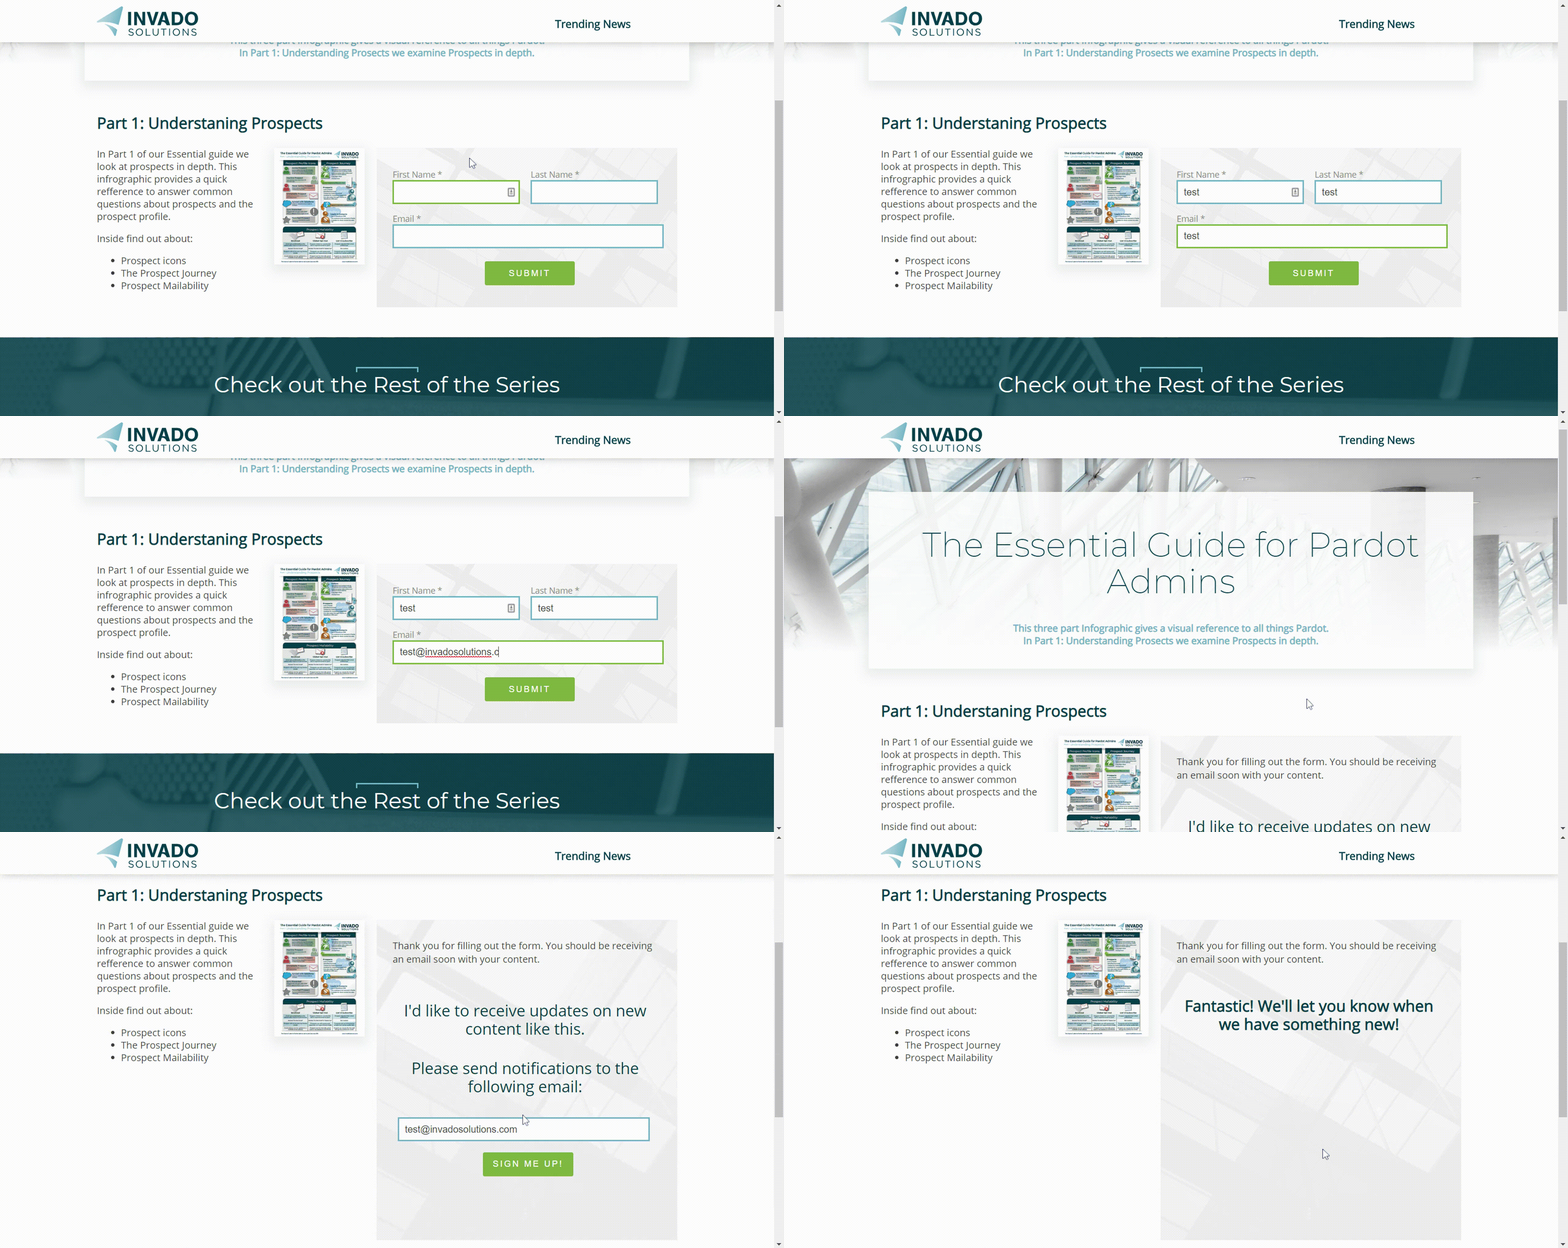
Next Level: Ramp it Up and Customize it
If you have multiple content lists and want to take this a step further, we can allow prospects to pick and choose which types of content they want from you.
To do this, we’re going to create a new “checkbox” type Prospect Field that lists all of our available mailing lists. To do that navigate to the Prospect Fields section under admin and click the button to add a new Custom Field. We don’t need to map the field to Salesforce, so we can just give it a name, set the type as “checkbox” and skip down to the Values section.
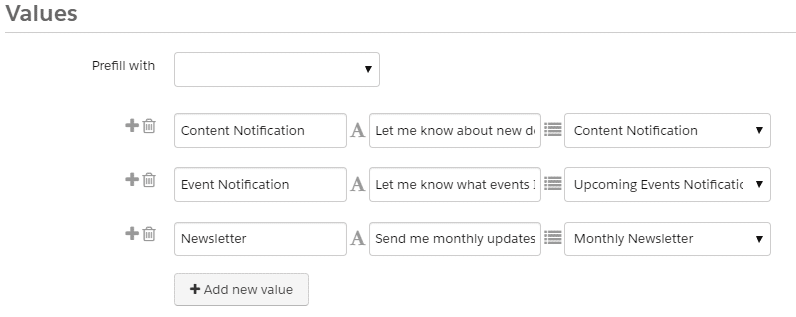
I’ve given each value a name that corresponds to it’s list in the left hand column. Then I used the middle column to enter custom labels that will appear on the form to explain what kind of content can be expected from each option. Finally, I used the right hand column to select a list that prospects who select that option will be added to.
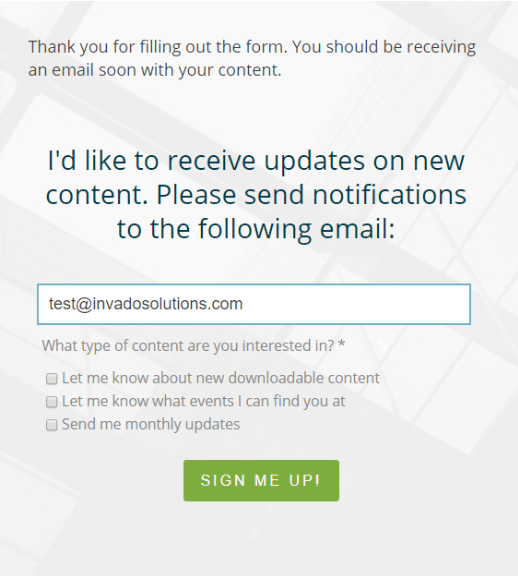
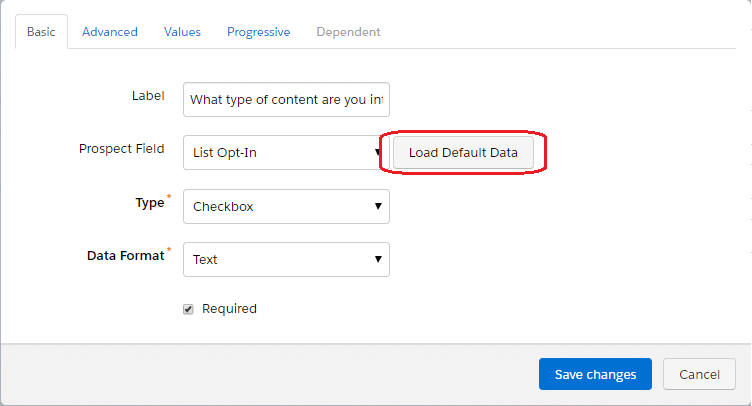
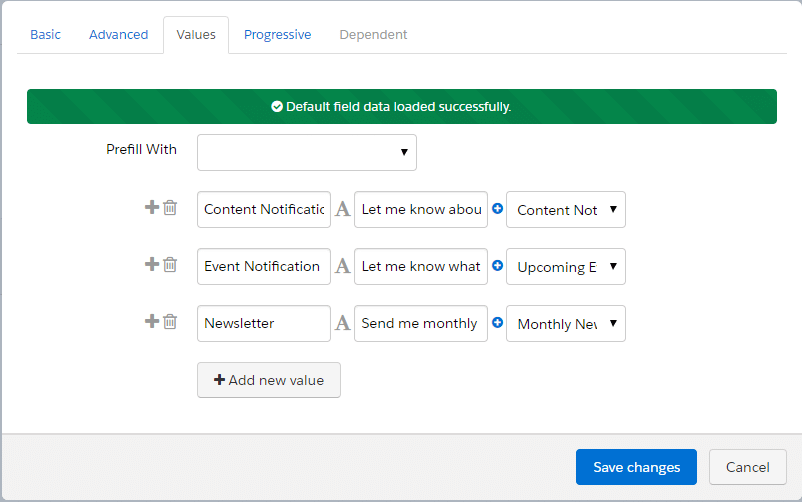
Now we can modify our Content Notification Form and add our new checkbox field. Since the labels are set up already, just select our new field’s name from the drop down and click the “Load Default Content” button. Verify in the “values” tab that everything looks correct. Since the form is now using actions on the individual field values, be sure to remove the previously used Completion Action from the form. Save the form to update everything.
Now our Thank You Content shows neatly displayed options for the types of messaging we have available. Our Prospects can select any or all of these options by simply checking a box.
