In the past 7 years, I have had the good fortune to work on hundreds of Salesforce orgs. I have seen many variations of configuration and have found that the orgs that use the Salesforce mantra of “Clicks before Code” are my favorite. However, whether you are working in an org that is coding spaghetti on the back-end or is configured using all of the best practices, there are a few tips that I have discovered that may make your job as an Admin who works in or supports Pardot a little easier.
There are several reasons why you might find yourself with duplicate or unclear field names. You may have installed a package from the App Exchange that created redundant fields, or you may have fields of different types but with the same field labels. On the surface, this may not seem like a big deal; however, it can cause confusion when creating reports, as the field label is all that you see in the report interface.
Do Not Contact fields on Contact object & how they appear in the field picker report interface
For duplicate fields, edit one of the field labels and add “deprecated” or “do not use” to the field that is not used or has been retired.
Add a description, i.e. “this field created by InsideView”, or “field populated via Process Builder”. Entering data in the Help Text field is also useful for fields whose labels may be less than clear. The Help Text data is viewable on the UI for all users with access to that field.
Do not use underscores in the field label. The API Names of all Custom fields have an underscore between words and end in a double underscore and the letter “c”. See the example below: All Traffic Sources (All_Traffic_Sources__c). I have seen instances where someone has created a field with underscores in the field label. I think we can all agree that that could be potentially confusing.
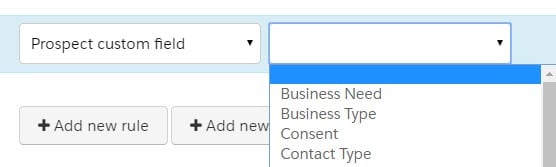
Custom field creation/mapping in Pardot
When creating custom fields in Pardot, be doubly sure to match the API Name of the field and not just the Field label. As long as you have mapped the correct Salesforce field to your custom fields in Pardot the field label that appears in the drop down will be the correct field.
Challenge #2: How did that value get in there?
The ability to see who changed a field value, what they changed it from and what they changed it to is extremely useful for all sorts of troubleshooting. To check to see if you are tracking the history of your most important fields on your Leads, go to Setup/Object Manager/Leads/Fields & Relationships and in the upper right hand corner, and click the button “Set History Tracking”. Check the box to “Enable Lead History” and then check the boxes next to the fields you want to be able to track changes for. Note: there is a limit of 20 fields per object.
If you are using Pardot and have segmentation based on specific field values, when possible, set history tracking for those fields.
Tracking the history on fields included in automations that change field values will help troubleshoot any errors that occur when automation processes have errors.
Create History reports, in addition to the normal field filters (i.e created date, etc.) – you can filter these reports by field /event edited and by “Old Value” and “New Value”.
These reports are especially helpful in resolving Pardot Sync Errors.
Challenge #3: Updating records using data exported from an SF Report
The record ID that is displayed in reports in the 15-digit ID. If you are updating the record, most import tools require the 18-digit ID.
Create a custom field for 18-digit ID on your most frequently used objects. Use a formula field with the data type of “text”, select “Advanced formula” and select “CASESAFEID”. The data that will be displayed is the 18-digit ID for that record.
Remember, Salesforce uses the 18-digit ID for the record you are updating and the 15-digit ID for any field values that are related to that record, including Owner ID. If you are updating records and you start by exporting a report, the value in the ID field will be the 15-digit ID. You can shorten the 18-digit ID by removing the last 3 characters or, you can create a 15-digit ID field by using this formula: LEFT( CASESAFEID(id), 15).
Challenge #4: Troubleshooting Pardot Segmentation List membership
Create a list view using the same filters as the Pardot List.
Note: You will need separate list views for Leads and for Contacts.
If your org uses record types, include them in your list view filters.
Use inline edit, if needed, to get the records you want included in your list to match your Pardot list criteria. There is a limit to the number of rows you can edit using inline edit; however, if you are testing your segmentation rules, this method will help you to identify which rules are working and which are not.
I cannot stress strongly enough the need for Salesforce Admins to think about their Marketers and for Marketing teams to learn more about Salesforce. By working together you will be able to create better data, better automation, better marketing, and better sales figures for the entire company. I hope these tips will assist you on that journey.
For more tips on Pardot, setting up Pardot, and optimizing your Salesforce and Pardot experience, contact your Pardot consultants at Invado Solutions.