The most common request I get when redesigning forms is to do something, anything, about the required asterisk. “It’s too hard to see!” “People don’t know it means required!’ “We have so many form errors!” If any of this sounds like you, then you’re in the right place.
You probably also have some idea of what you’d like it to look like. Some people want it in one of their brand colors, some people ask for it to be a bright red so that it stands out, some people just ask for Pardot’s default yellow star to go away. Well we here at Invado Solutions have a little script patch that will let you do pretty much whatever you want to your required field character in your Pardot forms. Here’s an example of what you can do with it:
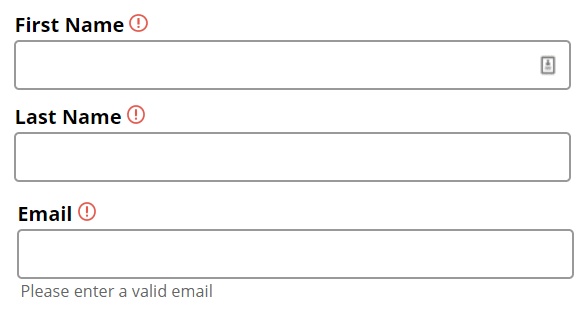
We’ll start by talking about Pardot’s basic options, then we’ll move on to how to use the script.
Step One: Removing Pardot’s Little Yellow Star
No matter what you want to accomplish with your required field character, the first step will be swapping out Pardot’s little yellow star for a plain text asterisk. For some, this may be enough on it’s own.
This is a point and click operation, no code needed just yet. Simply open the form wizard for the Pardot form you want to change by clicking the “edit form” button.
In step 3 of the wizard called “Look and Feel”, under the “Styles” tab, you’ll find a few settings that Pardot will let you change about your form. The one that we’re most interested in is called “Required Field Character” all the way at the bottom.
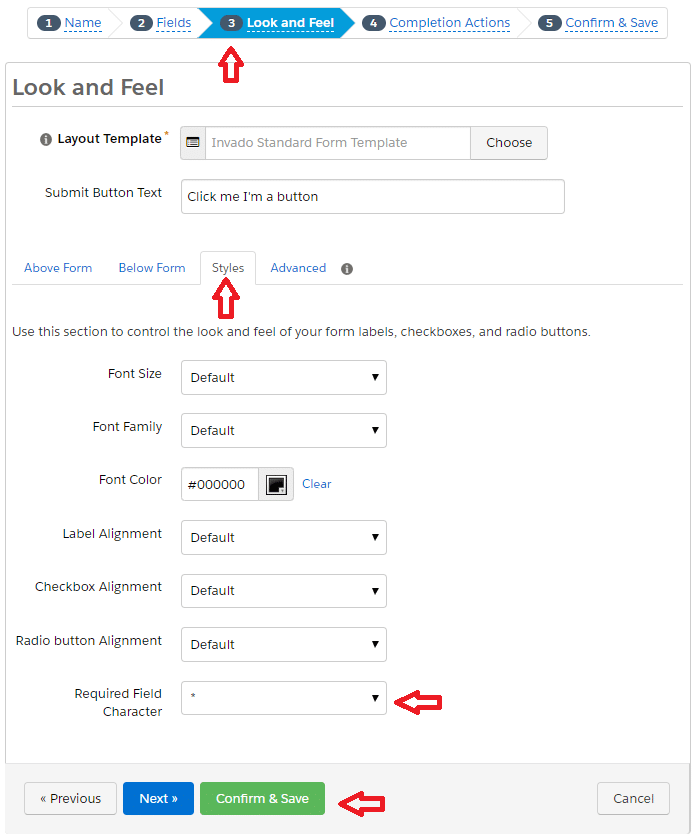
Out of the box, Pardot has two options for required field characters. Its default setting is an image of a little yellow star. The second option is a plain text asterisk that matches whatever formatting your field labels have. This is what the two options get you:

Regardless of your feelings on the plain asterisk, we have to choose this setting for our script to work. So select the plain text asterisk and save your form.
Step Two: Choosing the Script That’s Right for You.
I’ve built out two versions of this script that mirror Pardot’s two options. The first will just change the color of the asterisk, the second will allow you to replace it with an image of your own.
To change your asterisk’s color you’ll first need a hex color value. You can use a known brand color if you have that information, or you can use Google’s built-in hex value picker to select an eye catching, but not retina searing red color.
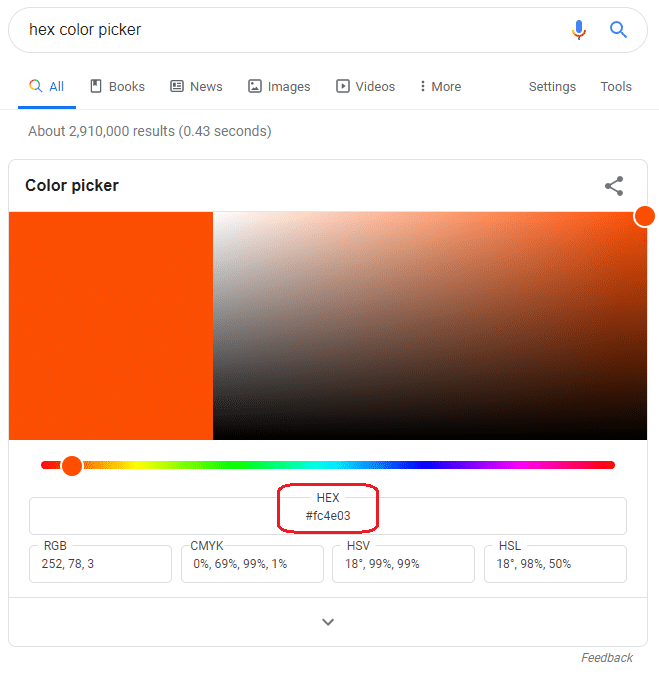
Whatever color you select will replace the highlighted section in the code below:
<!--VVVVthis script changes the color of the required asterisk-->
<script>
	var all = document.getElementsByClassName('field-label');
	for (var i = 0; i < all.length; i++) {
		var $oldReq = all[i].innerHTML;
		console.log($oldReq);
		var $newReq = '<span style="color:#ff0000!important;">*</span>';
		$oldReq = $oldReq.replace("*", $newReq);
		all[i].innerHTML = $oldReq
	}
</script>
To use an image for your required field character, first upload your image into Pardot by going to Marketing → Content → Files and then clicking the “+ Add File” button.
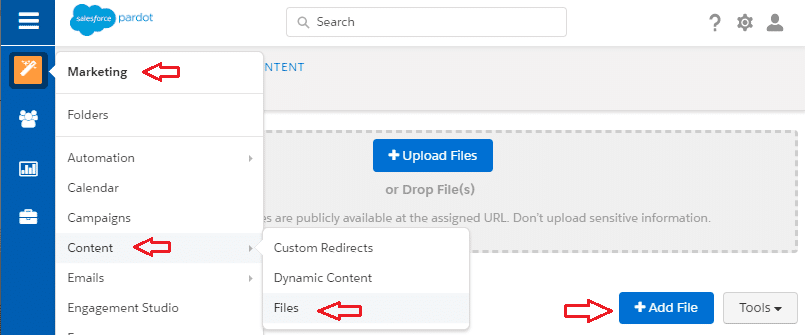
Click the button to choose your file and then set a vanity url for the file. This ensures that if you ever change the image you won’t have to update all of your templates.
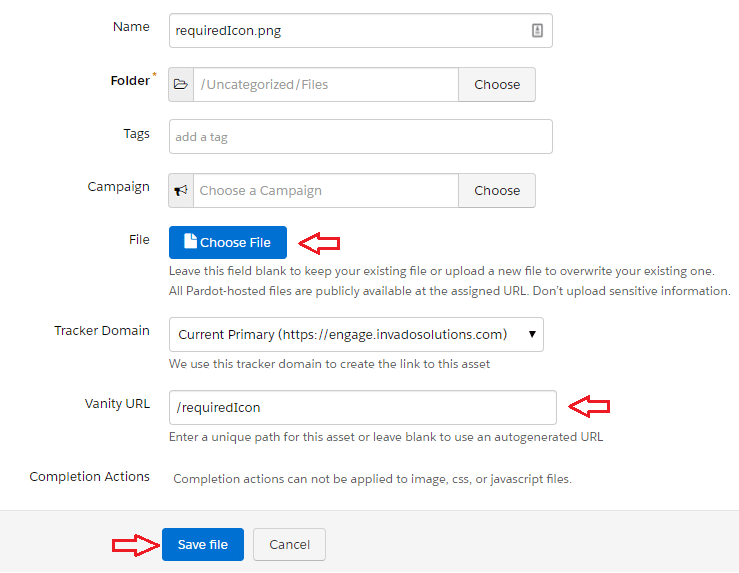
Finally Copy the image URL and replace the highlighted part of the code below:
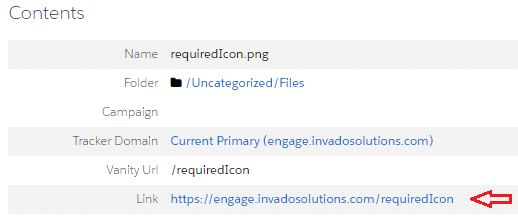
<!--VVVVthis script replaces the required asterisk with an image-->
<script>
	var all = document.getElementsByClassName('field-label');
	for (var i = 0; i < all.length; i++) {
		var $oldReq = all[i].innerHTML;
		console.log($oldReq);
		var $newReq = '<img src="https://engage.invadosolutions.com/requiredIcon" style="width:12px; height:12px;"/>'
		$oldReq = $oldReq.replace("*", $newReq);
		all[i].innerHTML = $oldReq
	}
</script>
Note: Make sure that you do not accidentally remove the slashes ( ) that are located before the quotes ( “ ); the script will not work without them.
Step Three: Adding the Required Field Character Customization Script to your Layout Template
Once you have your script configured with your color or image of choice, it’s time to put it into place. We’re going to do this in whichever layout template is currently applied to your form.
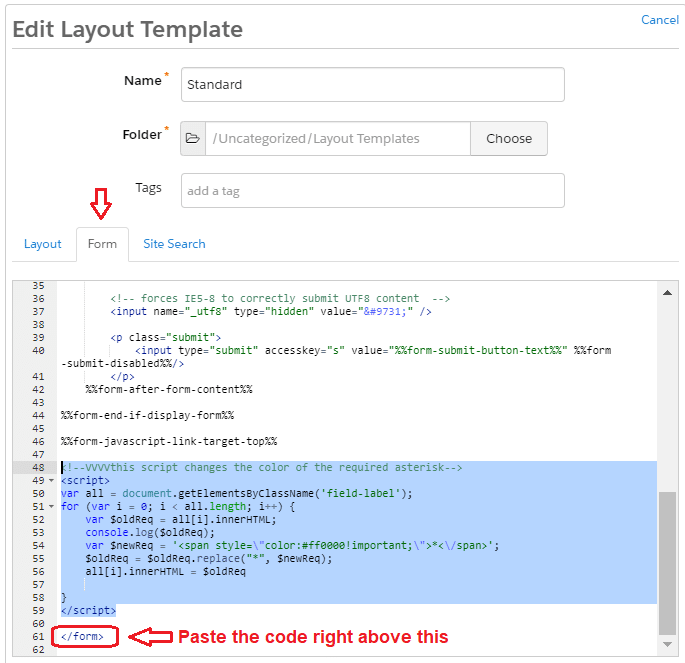
Open the Layout Template Editor and navigate to the “Form” tab. In here, scroll all the way down and paste your script right above the closed form tag ( </form> ). In the image below you can see my script (highlighted in blue) already pasted in place.
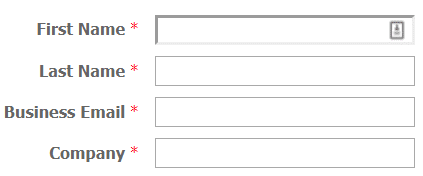

If you chose the script to replace the asterisk with an image you should now have a form that looks more like this:
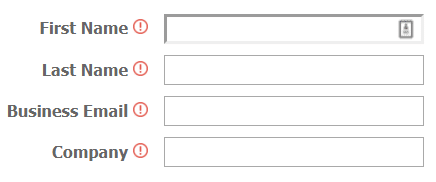

This script can easily be used with our downloadable form template and most other layout templates. If you’d like any further assistance customizing forms, emails, landing pages or other Pardot tips, feel free to reach out to our Pardot consultants at any time!


