Embed Social Cards to Make Your Pages More Shareable
We discussed in a previous post how Social Cards could benefit your click through rates on Pardot Landing Pages. I suggested getting started with AnyImage, but also mentioned that are some downsides to this. Let’s take a look at an example of an AnyImage card.
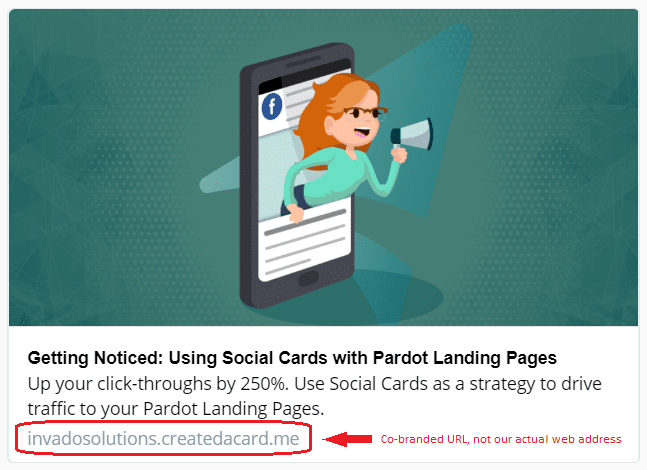
The first downside is that certain parts of your Social Card will be co-branded with AnyImage style links. The biggest issue, is that the Social Card will only work if the specific link that AnyImage provided is used. To complicate things further, you can’t see that link anywhere in the post. Anybody linking your page directly will still get the bland text only hyperlink.
The solution to all of these problems is embedding Social Cards directly into your Landing Pages.
Embedding Cards is Easier Than You Think
Pardot, unfortunately, doesn’t have a point and click Social Card builder and its documentation on the matter is pretty spotty. On top of that, there are a ton of ways to tweak and optimize Social Cards which can feel overwhelming.
What I put together in this post is more-or-less a catch all best practice that the everyday marketer can use for just about every Landing Page you’ll ever make. I hope that once you get your first one built, this will feel like second nature. Let’s dive right in.
Social Cards are built using a special type of code called “metadata” that should be found in the <head></head> section of your HTML. In Pardot these meta tags must be added into Layout Templates for Landing Pages. Once you’re in your Layout Template, locate the <head></head> tags near the very top of your Layout tab.
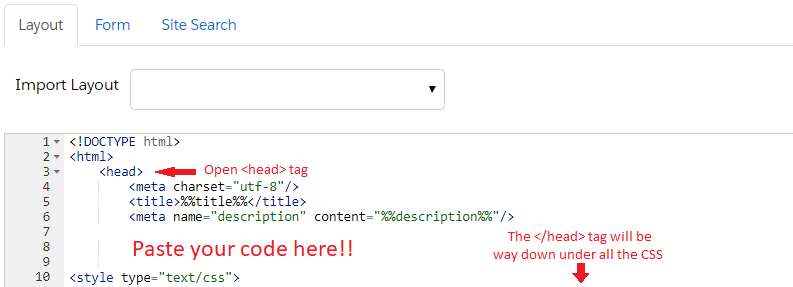
Paste all of the following code somewhere between those tags:
<meta property="og:type" content="website" />
<meta property="og:title" content="%%title%%" />
<meta property="og:description" content="%%description%%" />
<meta property="og:url" content="LANDING PAGE LINK" />
<meta property="og:site_name" content="YOUR HOME PAGE" />
<meta property="og:image" content="IMAGE LINK" />
<meta property="og:image:width" content="1200" />
<meta property="og:image:height" content="628" />

<meta name="twitter:card" content="summary_large_image" />
<meta name="twitter:title" content="%%title%%" />
<meta name="twitter:description" content="%%description%%" />
<meta name="twitter:url" content="LANDING PAGE LINK" />
<meta name="twitter:image" content="IMAGE LINK" />
When you’re done it should look something like this:
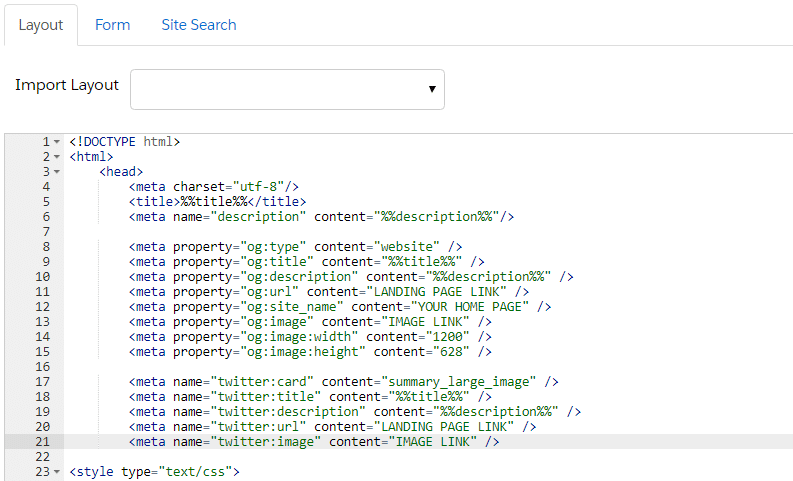
The only code you should ever have to replace is the content written in all caps. (LANDING PAGE LINK, YOUR HOME PAGE, and IMAGE LINK.)
Let’s talk about the individual tags
Now we can start breaking down all of our tags, what they mean, and what they do. First note that we have two groups of tags. The first group is the “og” or Open Graph tag. Open Graph is a standardized web protocol that helps social media sites classify and display third party information. The Open Graph protocol helps sites do a lot of really interesting things like rank favorites or suggest similar content. The important thing for us to know is that Facebook, LinkedIn, and Google+ all use the information in these Open Graph tags to build and display your Social Card.
You probably already guessed what platform uses the Twitter tags.
og:type – This tag tells the platforms what kind of content you’re linking. You can always safely use “website” for this and the Social Card will display with the standard layout. Other “types” are available and will alter what information is displayed. You can find a full list of types here if you’re interested.
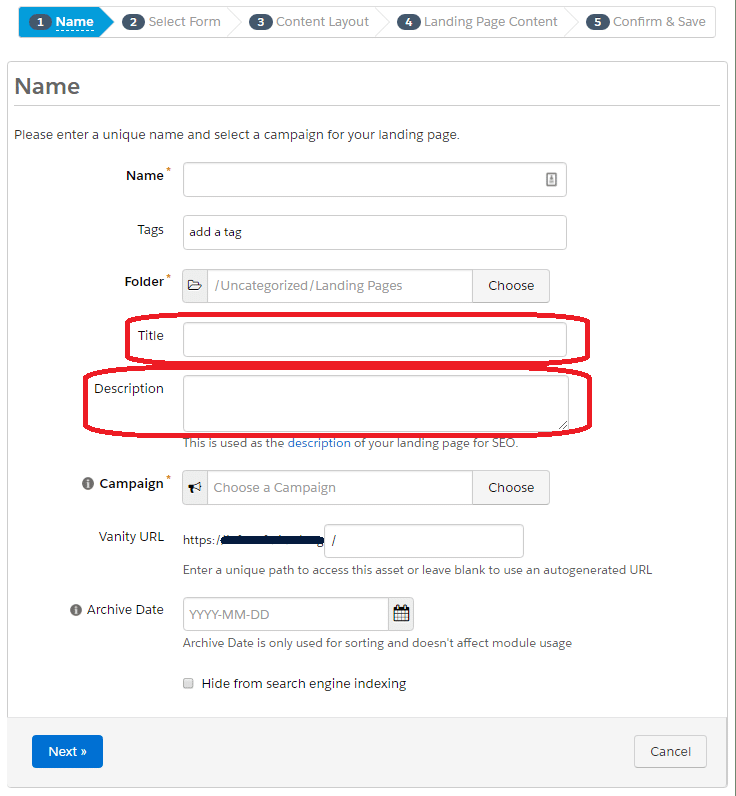
og:title and og:description – These will usually appear under the post image and display information about the page. I’ve pre-filled these tags with Pardot’s variable tags %%title%% and %%description%%. If left alone, these will automatically populate with whatever you’ve set as the pages title and description in the Name section of the Landing Page builder. (see below)
og:url – For this tag, replace the text in capital letters with the URL of your landing page. This lets the Social Card know where to send the traffic that clicks it.
og:site_name – This appears at the very bottom of the social card. Generally you’ll want to replace this text with either the name of your company or your companies main web address. This is important to include for Pardot Landing Pages because otherwise it will default to display the CNAME in the URL tag on some platforms. *note: this is not clickable, it’s just informative
og:image – This is the image that will display in your social card. Every platform uses slightly different layouts so the best practice is to create an image that will work everywhere. For this you’ll want to make something that’s 1200×628 pixels and keep all important content (like text and logos) about 40 pixels from the edge.
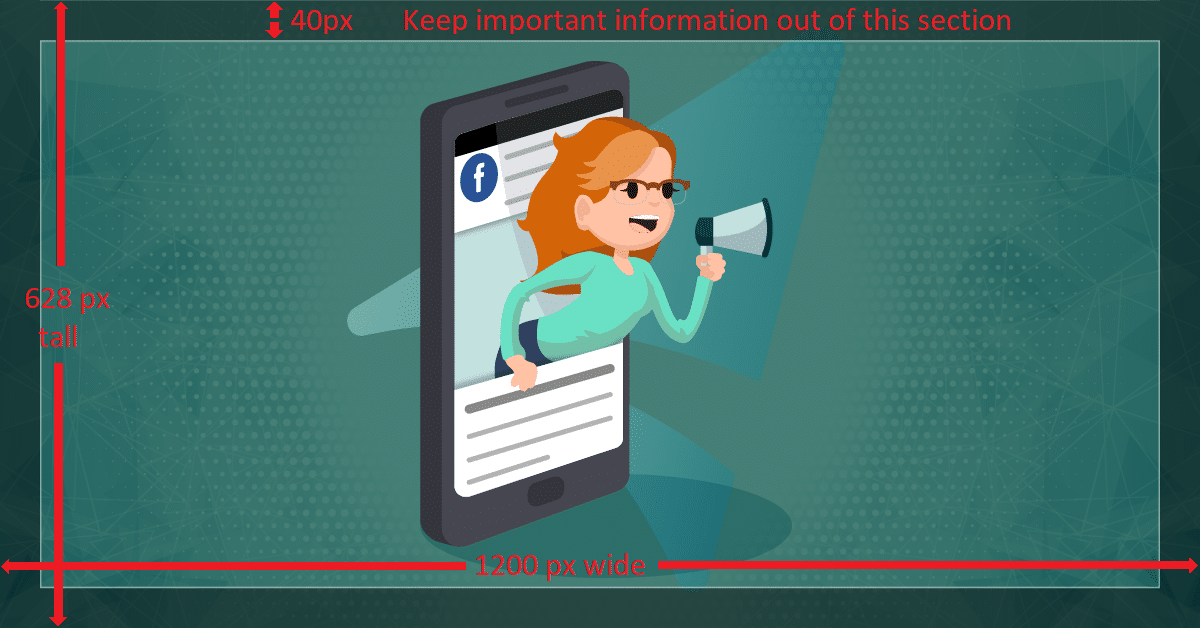
og:width and og:height – These tags will let the platforms know what size your image is natively and keep everything aligned as you’d expect.
twitter:card – this tells twitter what sort of layout your want for your social card. “Summary_large_image” will display large images like the example shown in our previous post on Social Cards.
The rest of Twitter tags can match up with their corresponding Open Graph tag.
Making Sure It works as expected
If you’re worried about how your social card will display, Twitter and Facebook both offer their own debuggers. For simplicity’s sake, I prefer Social Debugger because it shows you how your Social Cards will display, on all major social platforms, all in one place. Just pop in your Landing Page URL, check your grade, and quickly scroll through the page to make sure you haven’t forgotten to swap something out.
A Few Extra Things To Keep in Mind
You’ll Need a New Layout Template for Every Landing Page
You can’t access the <header></header> tags from Pardot’s landing page editor. Instead, you will need to create a new Layout Template for every Landing Page you want to have a Social Card. However, if you use the code above the only two tags you should need changed each time are the URL and image tags.
Your Social Card Images Cannot be Hosted in Pardot
Due to how Pardot handles SSL certificates, none of the major social media platforms will be able to display images uploaded into Pardot. As a first step to embedding a Social Card on a Pardot Landing Page, you’ll have to upload the image into the file directory for your main website and share the link from there.
Changes to the Metadata Tags Can Effect Existing Posts
If you make an update to the information in your tags, it can change all of the existing posts. However, most social media platforms cache whatever information they pull the first time and may not show your updates right away or at all. As a warning, make sure that your Social Card is functioning properly before anyone has a chance to post it.
On the flip side, however, you can use this to your advantage if you feel like fussing with ways to clear the cache. For example, if you set up a Social Card for an event registration page, you can alter the tags to let people know that registration is closed or that the event is over. You can even change the URL tag to lead to a page of upcoming events instead of the registration page. Twitter says it revisits pages about once a week to update the cache and display all of your new information. Some people claim that Facebook can be hurried along by entering the Landing Page URL into the Facebook debugger. It may be worth trying in certain situations.
If you need help setting up your Pardot Landing Pages, let us know how we can help!


